domingo, octubre 21, 2012

Expotar Notas de Outlook a una carpeta de Windows

[De: http://www.syncdroid.net/export-outlook-notes-to-folder]


There are a lot of people who want a free way to export their Outlook notes to text files.  From there they can do many useful things like send them to Google Docs or put them in a Dropbox folder, both of which can then sync them from a PC to an Android device.  Here is a step by step method of exporting those notes.  It may seem tricky, but it really is simple and should take all of 5 minutes to complete.  The notes will be exported into text files with the same name as the notes.  The exception is that note names with "/" or "\" will have those characters replaced with a hyphen ("-").
  • Create a folder on the root of the C: drive called "Notes" (C:\Notes).
  • Open Outlook.
  • Press ALT-F11 which will open Outlook's Visual Basic window.
  • Click on Insert (top toolbar) and Module.  You should see a new window pane open labeled something like Project1, Module1.
  • Copy the following code and paste it in the Module1 window pane: 
Sub NotesToText()
    Set myNote = Application.GetNamespace("MAPI").PickFolder
    For cnt = 1 To myNote.Items.Count
        noteName = Replace(Replace(Replace(myNote.Items(cnt).Subject, "/", "-"), "\", "-"), ":", "-")
        myNote.Items(cnt).SaveAs "c:\notes\" & noteName & ".txt", OlSaveAsType.olTXT
    Next
End Sub
  • Click on Run (top toolbar) and then "Run Sub/Userform".
  • A window will pop up asking you to select the folder where your notes are located.  For most people, this will simply be your normal Notes folder.  Select the Notes folder and then select OK.  The Notes are exported at this point.
  • Close the Microsoft Visual Basic window.
  • Close Outlook.  You will receive a popup window asking if you want to save the VBA project.  Answer No.
  • Look in the Notes folder on the C: drive to find your notes.

If you received a "Run time error", click End and then check the following:
  • Did you REALLY name the folder "Notes" in the root of the C: drive?
  • If you changed the name of the folder, did you REALLY end the path name with a backslash?
  • Select Run and then "Run Sub/Userform" again.

sábado, octubre 13, 2012

Can I install multiple SkyDrive apps on my desktop?

[De: http://askludwig.com/2012/06/02/can-i-install-multiple-skydrive-apps-on-my-desktop/]


The short answer is “no, you can’t”, but the longer answer is, “there is a way”.
If you have two Microsoft accounts (Windows Live IDs), you have a SkyDrive for each. The SkyDrive app on the desktop makes managing the files and folders in the SkyDrive as easy as any other folder. So you might want to have access to both right on your desktop.
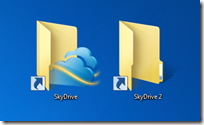
imageYou cannot install the SkyDrive app multiple times on the desktop, that simply does not work. There is a work-around, however, and once established, works just as you expect – two folders on the desktop, each accessing its own SkyDrive. Not only that, both get synchronized automatically.
Here is the how to install two separate SkyDrive folders on your desktop. Assumed here is that the computer is running Windows 7.
  • Create a user account on your computer for the second Microsoft account. In this article I will call the original user “user 1” and new user “user 2” and the SkyDrive belonging to that user SkyDrive 2User 2 can be a “Standard user” (and really should be).image
  • Switch to user 2Start > power ►> Switch user
  • Start Internet Explorer, sign in with theuser 2 credentials. Click SkyDrive in top menu.
  • imageClick Get SkyDrive apps (navigation pane, bottom). Follow through and download and install the SkyDrive app.
  • Switch back to user 1.
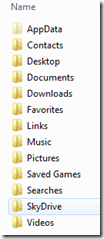
  • Open Windows Explorer. Navigate to Local Disk > Users >user 2. This is the default location where the local SkyDrive folder is located.
  • Right-click on the SkyDrive folder listing. Click on Send to in the drop-down menu and click Desktop (create shortcut).
That’s it. You now have a desktop shortcut to SkyDrive 2, the one foruser 2.
Note that I did not ask you to log out either user. So long as both users are logged in on your computer the synchronizing of the SkyDrive folders will proceed for both. Keep in mind that downloading and especially uploading of files takes considerable time as determined by your Internet connection.
Both folders will be accessible, of course, at all times, including when the Internet connection is not available. Synchronization will resume when the Internet connection is reestablished.

jueves, agosto 02, 2012

The 6 People You Need in Your Corner

Jessica Hagy, Contributor

http://www.forbes.com/sites/jessicahagy/2012/07/17/the-6-people-you-need-in-your-corner/

Nothing incredible is accomplished alone. You need others to help you, and you need to help others. With the right team, you can form a web of connections to make the seemingly impossible practically inevitable.

The Instigator:

Someone who pushes you, who makes you think. Who motivates you to get up and go, and try, and make things happen. You want to keep this person energized, and enthusiastic. This is the voice of inspiration.

The Cheerleader:

This person is a huge fan, a strong supporter, and a rabid evangelist for you and your work. Work to make this person rewarded, to keep them engaged. This is the voice of motivation.

The Doubter:

This is the devil’s advocate, who asks the hard questions and sees problems before they arise. You need this person’s perspective. They are looking out for you, and want you to be as safe as you are successful. This is the voice of reason.

The Taskmaster:

This is the loud and belligerent voice that demands you gets things done. This person is the steward of momentum, making sure deadlines are met and goals are reached. This is the voice of progress.

The Connector:

This person can help you find new avenues and new allies. This person breaks through roadblocks into finds ways to make magic happen. You need this person to reach people and places you can’t. This is the voice of cooperation and community.

The Example:

This is your mentor, you hero, your North Star. This is the person who you seek to emulate. This is your guiding entity, someone whose presence acts as a constant reminder that you, too, can do amazing things. You want to make this person proud. This is the voice of true authority.

lunes, julio 02, 2012

Configurar cuenta IMAP @Yahoo.com.ar en Microsoft Outlook y Windows Live Mail

IMAP para mantiene sincronizadas las carpetas de cuenta de correo.

Una vez abierto Outlook o Windows Live Mail ir a la configuración de la cuenta, se agrega una cuenta nueva y la configuramos de la siguiente forma:

Su nombre: se ponemos el nombre que aparecerá como remitente del correo ejemplo: Juan Pérez secreto

Dirección de correo electrónico: se pone la dirección de corro ej.: myself@yahoo.com,

Nota: no importa si la dirección termina por ejemplo en .ar, se pone hasta el “.com”

Tipo de cuenta: IMAP

Servidor de correo entrante: imap.mail.yahoo.com

Servidor de correo saliente: (SMTP): smtp.correo.yahoo.com.ar

En la seccion de “informacion de inicio de sesion:

Nombre de usuario: dirección de yahoo sin el @yahoo.com o el @yahoo.com.ar

Ejemplo, si la dirección es myself@yahoo.com.ar, solo poner “myself”

Contraseña: la contraseña de la cuenta de correo

Botón que “Más configuraciones” y nos pestaña “servidor de salida”, seleccionar la opcion “mi servidor de salida (SMTP) requiere autenticación” y también se selecciona “utilizar la misma configuración que mi servidor de correo de entrada”

Pestaña “avanzadas” y en donde dice “servidor de entrada (IMAP), puerto 993

Seleccionar (SSL) donde dice “usar el siguiente tipo de conexión cifrada”

En donde dice “servidor de salida (SMTP) escribir el número de puerto 465, y seleccionar en la opción “usar el siguiente tipo de conexion cifrada:”, la opción SSL

Click en el botón aceptar.

jueves, mayo 24, 2012

Tipos de hosting

Types of web hosting services - May 15, 2009

Not many peoples know about all types of webhosting services available today. Most of them, look for cheapest and most affordable hosting plan and basically pick a shared plan.However, depends on customer (private person or business company) they should look for best fit, before anything else

So, here are all existing types of website hosting services:

  • Shared
  • Dedicated
  • Colocation
  • Reseller
  • Virtual Dedicated
  • Managed / Unmanaged
  • Grid
  • Exchange
  • Domains
  • Emails
All these hosting types can be hosted on different operating systems ( aka "OS platforms")
  • Linux or Unix Operating System
  • Windows Server Operating System
  • Cloud
Shared Webhosting

This type refers to a webhosting service where a lot of websites are located on one webserver (or sone services on one machine). Each website has allocated its own resource (and directory) on the server to keep it separate from other sites with certain permissions. This is in general the most cheaper option for hosting as many customers share the overall cost of server and maintenance, but has a big disadvantage: one customer abuses the server resources, all other customers are highly affected, therefore is most difficult to be managed properly by website providers. This type of webhosting is suitable for most of peoples which are having a small to medium traffic to their website (along email mailboxes, etc..). Most of top hosting companies are very stricted on their TOS (Term of service) and they may shutdown your website in case overload the machine using too many resources. Hosting brands offers variouscontrol panels to manage this type of hosting

Dedicated Webhosting

Dedicated service or dedicated server, is a type of Internet hosting in which the client leases an hole server not shared with anyone. This is more stable and flexible then shared webhosting, as customer have full control over the server, including choice of hardware and operating system. Server maintenance can be provided by the datacenter provider as an add-on service with extra cost. Best dedicated server offer less overhead and a larger return on investment. Dedicated servers are most often housed in data centers and the price is a lot higher then shared (or budget). In contrast to collocation, the server hardware is owned by the provider and in some cases they will provide support for your operating system or applications. This type of service is suitable for medium to big customers or companies, which are having websites with big traffic, uses many resources and also having their business depending by the Internet. Hosting companies offers at extra cost various control panels to manage this type of hosting

Home server is a dedicated hosting placed in a private residence and can be used to host one or more web sites from a usually consumer internet connection. These can be purpose-built machines fully managed by the home owner

Clustered hosting means having multiple dedicated servers working in the same content for better resource utilization. Clustered Servers are a perfect solution for high-availability dedicated hosting, or creating a scalable website solution. Can be used apart of separating resources (e.q: database on one machine, web on other machine

Colocation Webhosting

Collocation center is a type of solution where customers are owning their server and use just the facility from data center providers. This means data center is providing their infrastructure for internet, AC, electricity etc. to colocate customers servers. In such cases the monthly cost is less, but the cost for servers is supported by customers. This is option to use for people they need physical access to the server hardware. Colocation has its charms, but it is especially useful for mission critical online applications, not just simple web pages.

Reseller Website Hosting

This is a form of website hosting where the account owner has the ability to use his allotted hard drive space and bandwidth (basically all resources) to host other customers websites like being a hosting provider. The reseller purchases like a big hosting plan and then sells them to customers as smaller parts. A certain portion of hard drive and bandwidth is allocated to the reseller account. The reseller can even rent a dedicated server from a company or resell shared services. In the latter case, the reseller is simply given the permission to sell a certain amount of disk space and bandwidth to his own customers without renting a server from a website company he signed for a reseller account. One of the biggest issue for reseller hosting is the customer support. This customer support is "normally" intended to be delegated for reseller, but they ultimately have to contact the parent company for issues which they cannot solve. Companies offers various control panels to manage all features, including billing support

Virtual Dedicated

Called sometimes VDS (Virtual dedicated server or VPS), is a method of partitioning a physical server computer into multiple virtual servers such that each has the appearance and capabilities of running on its own dedicated machine. There are certain software already doing this job, like: Vmware or Virtuozzo. Each virtual server can run its own operating system (even Linux and Windows platforms), but each server is sharing the same physical resources. This type of hosting is better then sharing and worse then dedicated in quality and price, but there are several advantages for a datacenter to offer virtual dedicated over dedicated hosting, like: server space (one machine can "serve" multiple servers), electricity and few other things.

Managed Webhosting

Managed Hosting is a type of dedicated. Basically, there are two ways of dedicated: unmanaged and managed. These two are in several ways similar to each other but also they differ in some ways. As opposed to unmanaged hosting, for managed the wesbite provider makes sure that everything works as it should, also when it comes to any software (OS standard or custom software)Managed hosting will be a smooth ride as you don't have to be a website expert when working with your site. The provider is responsible for everything from software to equipment and maintenance. Managed Web Hosting has extra cost over unmanaged web hosting, but give's you ability to stay focused on using the applications installed on the machine instead of doing any work maintainance for the server.

Grid

Grid is a flexible webhosting platform that matches performance on demand. If they site traffic grows, Grid Hosting responds by allocating more resources and keeping your site live. If your site starts small, but is growing, Grid grows with it so you don't have to manually upgrade and experience any unnecessary downtime.Grid Webhosting "pools" the websites resources of many servers and your site's content resides on multiple servers. This networked system helps achieve a high reliability - beyond 99.9% for your Web site because if one server shuts down, only a fraction of the grid's resources are lost. Grid Hosting has resources in reserve which are always available to allocate when necessary.Compared with Shared, Grid offers increased availability and scalability. Shared can handle a limited amount of traffic, beyond which the site becomes unreachable. Grid responds to hight traffic by adding additional resources to your site, keeping your site live regardless of traffic.
Due to differences in Grid Hosting, it cannot offer support for some of the technologies that Budget webhosting can:
* Access databases are not supported due to Access locking scheme which prevents concurrent usage from different processes.
* Front Page Server Extensions are not supported by some providers.
* Java and ColdFusion may not be supported.
* Concurrent file writes to the same file in multiple sessions or concurrent threads. Example of affected resources: File-based databases and cross session log files (these issues are exaggerated in a Grid environment due to additional volume).
* Storing data within the Application namespace and depending on multiple concurrent sessions accessing accurate data for the entire application.
* Static Classes where sessions across the site (application) must have concurrent access to accurate data.

Exchange Hosting

Microsoft Exchange server is one of the most popular email and collaboration platform for business. It helps business better communicate with partners and customers, and increases employee productivity. However, building and managing an Exchange server environment is costly and complex. It requires a large investment in hardware, software, and technical expertise to install it, configure it, and manage it on a daily basis. Exchange webhosting allows SMBs to enjoy all the productivity and collaborative benefits of Exchange, without any of the frustrations of managing it in-house.

Domain Hosting

In few words having just domain and some online tools to create some web pages. Can include tools to manage the DNS zone.

Email Hosting

An email webhosting service is an Internet web service that runs just email servers (usually with a lot of features). Email hosting services offer premium email at a cost as opposed to advertising supported free email or webmail. Email services thus differ from typical end user email providers such as webmail sites. They cater mostly to demanding email users and Small and Mid Size (SME) businesses, while larger enterprises usually run their own email hosting service. Emails providers allow for premium email services along with custom configurations and large number of accounts. In addition, hosting providers manage user's own domain name, including any email authentication scheme that the domain owner wishes to enforce in order to convey the meaning that using a specific domain name identifies and qualifies email senders.
Most email website providers offer advanced premium email solutions hosted on dedicated custom email platforms. The technology and offerings of different email hosting providers can therefore vary with different needs. Email offered by most companies is usually more basic standardized POP3 based email and webmail based on open source webmail applications like Horde or Squirrelmail. Almost all webhosting providers offer standard basic email.
Reviews

[Estas recomendaciones también sirven para analizar otros tipos de Review, software, hardware, servicios, etc.]

Webhosting Reviews - which one to trust

Number of hosting companies increased exponentially and so websites with webhosting rating, therefore today is even more difficult to pick the correct internet website provider based on user reviews. Here are some guides how to look over hosting ratings:

  • Check Google Page Rank - this will show you if the review website is valuable and authority resource. An important review site must have at least PR5 (web-hosting-top.com is PR6)
  • Check how old is the domain name (when was registered the domain), by looking into whois information. Tool http://www.internic.net/whois.html and check "Creation Date:" field of the result (web-hosting-top.com is from 2004)
  • Look how many pages has the website indexed in Google. Search by "site:hosting-review-site" (where hosting-review-site is the actual hosting review website. Example:site%3Aweb-hosting-top.com (web-hosting-top.com has over 80.000 pages indexed!)
  • Check for affiliates links. Most of rookies websites today uses CJ (Commission junction) links. In any case, if you see that link to the hosting company is different then hosting company URL (or having some other parameters like affiliateid=ID ..) then more likely is affiliate link
  • See if there are any bad user reviews. There is no hosting company today only with happy customers. If you see only good reviews, then is obvious that the website is fake promoting only good opinions
Hosting Reviews - conclusion

From our experience, about 90% of webhosting review websites today are presenting fake "top 10 web hosting" or "hosting ranks", pushing customers to buy accounts and register domains from brands which pays over affiliate programs the higher commissions. The biggest issue with such websites is that presents only good reviews, instead to publish the bad reviews from unhappy customers, which will show the reality. If you don't know how to pick a correct hosting provider and trust some fake hosting review, you will end up with a possible poor company and bad deal for your money and website

sábado, marzo 10, 2012

Export Outlook Notes to Document or Text Files

Export Outlook Notes to Document Files

There are a lot of people who want a free way to export their Outlook notes to separate document files. Here is a step by step method of exporting those notes. It may seem tricky, but it really is simple and should take all of 5 minutes to complete. The actual export happens so quickly you will be astonished. The notes will be exported into Word or text documents with the same name as the notes.

Please understand that Windows does not allow many special characters in file names, so you will need to manually remove any special characters like <.>:"/\|?* from your note name before the conversion. The following device names are also restricted from use as file names by Windows and should not be the name of a note: CON, PRN, AUX, NUL, COM1, COM2, COM3, COM4, COM5, COM6, COM7, COM8, COM9, LPT1, LPT2, LPT3, LPT4, LPT5, LPT6, LPT7, LPT8, and LPT9. To help you out, the code I provided will automatically replace any "/" or "\" characters with a "-". The rest is up to you to rename manually or you may alter the code to convert even more restricted characters or names.

  • Create a folder on the root (main part) your C: drive named "Notes". It isimportant that this folder be on the root of the C: drive.
  • Open Outlook.
  • After Outlook opens, click on the top bar of the Outlook window next to the name Microsoft Outlook.
  • Press ALT-F11 which will open Outlook's Visual Basic window. If it does not open, be sure you clicked on the top bar of the Outlook window and press ALT-F11 again.
  • On the top toolbar, click on Insert and Module. You should see a new window pane open labeled Project1, Module1.
  • Copy the code you find listed below in this article and paste it in the Module1 window pane. If you wish to export to a document that can be opened in Word (rich text format), use the NotesToRTF code. If you wish to export to text files, use the NotesToText code.
  • On the top toolbar, click on Run and then click on "Run Sub/Userform".
  • A window will pop up asking you to select the folder where your notes are located. For most people, this will simply be your normal Notes folder. Select the Notes folder and then select OK. [More advanced users may select different note folders they may have created, following these steps over and over until all their notes are exported.]
  • The Notes will quickly be exported at this point. "Running" will appear next to "Microsoft Visual Basic" window name at the top of the screen and disappear when the notes are exported. You may see it flash for a second if you have just a few notes. For hundreds or thousands of notes, it will take longer. Wait for "Running" to go away and you may proceed.
  • Close the Microsoft Visual Basic window.
  • Close Outlook. You will receive a popup window asking if you want to save the VBA project. Answer No.
  • Look in the Notes folder on the C: drive to find your notes.

If you received a "Run time error", click End and then check the following:

  • Did you use a restricted character or name in a note?
  • Did you REALLY name the folder Notes in the ROOT of the C: drive?
  • Fix the folder name and then go back to the Microsoft Visual Basic window and click on Run and then "Run Sub/Userform" again.
  • The code is proven and should work every time when you follow the directions. If it still fails, I suspect you may have a corrupted Outlook data file. There are many Hub pages that address how to fix the problem. Simply search for "scanpst" and follow he directions listed in the page.

NotesToRTF Code

Sub NotesToRTF()

Set myNote = Application.GetNamespace("MAPI").PickFolder

For cnt = 1 To myNote.Items.Count

noteName = Replace(Replace(myNote.Items(cnt).Subject, "/", "-"), "\", "-")

myNote.Items(cnt).SaveAs "c:\notes\" & noteName & ".rtf", OlSaveAsType.olRTF

Next

End Sub


NotesToText Code

Sub NotesToText()

Set myNote = Application.GetNamespace("MAPI").PickFolder

For cnt = 1 To myNote.Items.Count

noteName = Replace(Replace(myNote.Items(cnt).Subject, "/", "-"), "\", "-")

myNote.Items(cnt).SaveAs "c:\notes\" & noteName & ".txt", OlSaveAsType.olTXT

Next

End Sub

[de http://emperorcrusher.hubpages.com/hub/Export-Outlook-Notes-to-Document-Files]

Ejecutar una macro cuando se abre Outlook

An Outlook Visual Basic for Applications (VBA) macro can use this event procedure to initialize itself when Outlook starts.

Example
This Microsoft Outlook Visual Basic for Applications example displays a welcome message to the user and maximizes the Outlook explorer window when Outlook starts.
Private Sub Application_Startup()
    MsgBox "Welcome, " & Application.GetNamespace("MAPI").CurrentUser
    Application.ActiveExplorer.WindowState = olMaximized
End Sub

1. Launch Outlook.
2. Set your security to Medium or Low (sounds like you did.)
3. Press Alt + F11 on your keyboard
4. If you do not see a module when the Visual Basic editor launches:
    *Expand the folder labeled Microsoft Outlook Objects in the Project Explorer Window.
    *Double click ThisOutlookSession
5. If the module is blank:
    *click the Object dropdown at the top of the module window (it reads General)
    *Select Application
    *Select Startup from the Procedure dropdown (it reads Item Send)
You should now have a code window like this:

CODE

Private Sub Application_ItemSend(ByVal Item As Object, Cancel As Boolean)
End Sub
_____________________________________________________________________
Private Sub Application_Startup()
End Sub

Write your code in the Application_Startup() routine.

[de http://www.tek-tips.com/viewthread.cfm?qid=1276053]

lunes, febrero 13, 2012

Como utilizar WhatsApp en Windows


WhatsApp en un PC : Manual para instalar WhatsApp en el ordenador

Cracklock–El Túnel del tiempo para aplicaciones Windows


Cracklock

Esta utilidad permite protegerse del virus más polimórfico y perjudicial del fin de siglo, el que se hace llamar "El virus del trigésimo día". Este ataca tanto a los mejores como a los peores Sharewares al introducirles, al momento de instalación un error que les impide funcionar más allá de un tiempo determinado, frecuentemente 30 días. Cracklock está a la vanguardia en la lucha contra este mortal virus que muy pocos antivirus han podido combatir.

Cracklock es además una herramienta que los desarrolladores pueden usar para verificar en sus productos el problema del año 2000, conocido por sus siglas en inglás "Y2K". Esto sin tener que cambiar la fecha de a computadora y evitándose así potenciales problemas y efectos colaterales.

Eventualmente, sería posible utilizar Cracklock, para cambiar le fecha de expiración del período de prueba de, por ejemplo, 30 días, de algún determinado software. Sin embargo, debe tenerse en cuenta, que utilizar un software, pasado el período de prueba, podría ser ilegal en algunos países.

YouWave–Emulador de Android para Windows


YouWave

Esta aplicación permite utilizar cualquier aplicación para Android, Android Market, desde Windows.

domingo, febrero 05, 2012

Configurar correo Hotmail como POP3 en Android

La configuración de una cuenta Hotmail en un teléfono móvil se puede lograr configurando una cuenta POP3 de Hotmail en dicho programa.

En la opción de Cuentas (Accounts), disponible al oprimir la tecla menú en el celular, seleccionar Añadir nueva Cuenta.

Luego especificar la dirección de Hotmail, y seleccionar la opción POP3. Se puede seleccionar si es la cuenta predeterminada o no.

Los datos de configuración de correo de entrada Hotmail son los siguientes:

Servidor POP3: pop3.live.com
Conexión segura POP3: no
Puerto POP3: 995
Utilizar SSL para POP3: sí

Para los datos de correo de salida SMTP:

Servidor SMTP: smtp.live.com
Autentificación SMTP: sí
Contraseña SMTP: (la de la cuenta de mail)
Puerto SMTP: 25
Utilizar SSL para SMTP: sí
Usar STARTTLS: sí

martes, enero 31, 2012

Resumen de llamadas hechas con SkyPe


Debido a mi trabajo, en muchas oportunidades debo hablar con mis clientes por SkyPe y a la vez utilizar alguna herramienta de control remoto para tomar control de sus equipos.

Las llamadas pueden ser breves o prolongadas, y a veces varias en el día, con distintos clientes.

Las horas dedicadas en estas tareas son una parte de la factura que les presento regularmente.

Hasta hora, lo que hacía era anotar lo más prolijamente posible en un cuaderno o en una planilla de cálculo. La otra alternativa, cuando no tomaba nota debido a mi falta de constancia, era revisar los logs de SkyPe, tarea que result bastante tediosa y lleva su tiempo.

Hasta que descubrí un programa que resuelve mis necesidades y que además es freeware. Se trata de SkyPeLogViewer de NirSoft. En este mismo sitio, encontrarán una gran cantidad de utilidades y programas, que seguramente le simplificarán la vida a más de un usuario de PCs.

Tiene una gran cantidad de opciones, como ser ver los mensajes de texto (chat), llamadas entrantes, llamadas salientes, etc. pudiéndose elegir cualquier combinación de ellas.

Es posible seleccionar un conjunto de líneas de la grilla en que muestra los datos y copiarlas y pegarlas en Excel para hacer las totalizaciones y/o análisis necesarios.

Muy, muy recomendable.

De Imágenes de Blogger

¿Cómo se puede apagar un equipo cuando se está conectado a través de Escritorio remoto?


Cuando se está conectado a una estación de trabajo a través de Escritorio remoto, en el menú Inicio no parece la opción  "Apagar equipo", si no la opción "Desconectar". Pero lo que usted realmente quiere hacer es apagar el máquina, reiniciar, hibernar, o suspender.

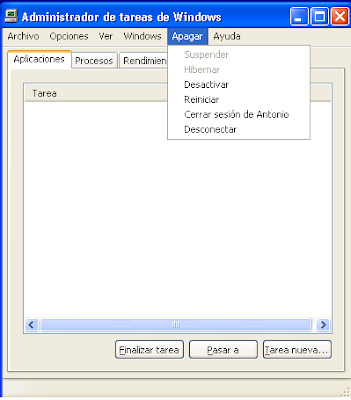
En Windows XP, se puede ejecutar el Administrador de tareas y seleccionar la opción de "Apagar" en el menú, y seleccionar la opción deseada. No incluye la opción "Apagar".


Otro manera es hacer click en el escritorio y presionar Alt + F4. Esta alternativa funciona tanto en Windows XP como en Windows 7.

Aparecerá el diálogo las opciones que permitirán apagar el equipo.

En Windows XP:


En Windows 7:


Si ambos equipos tienen Windows 7, puede utilizar las teclas Ctrl-Alt-Fin en la máquina remota. En la esquina inferior derecha de la pantalla, aparece un botón con un icono similar el de prender / apagar, y una flecha. Haciendo click en la flecha, Aparecen las opciones de Reiniciar, Hibernar y Apagar.

sábado, enero 21, 2012

Microsoft Windows 7 no viene con Hyperterminal


Se puede copiar el Hyperterminal de otra PC que tenga WIndows XP.
Los archivos de la instalación de XP que hay que copiar son los siguientes:

1. C:\Program Files\Windows NT\HYPERTRM.EXE
2. C:\Windows\Help\HYPERTRM.CHM
3. C:\Windows\Help\HYPERTRM.HLP
4. C:\Windows\System32\hypertrm.dll

En WIndows 7, crear una carpeta dentro de C:\Program Files\  que se llame "HyperTerminal", y copiar allí los 4 archivos.
Finalmente crear un acceso directo a "C:\Program Files\HyperTerminal\HYPERTRM.EXE" en el menú de Inicio o en el Escritorio.