This registry hack comes from Superuser JosefZ.
Open Notepad and paste the following. Save it with the name OpenWith, and the REG extension.
Windows Registry Editor Version 5.00

[HKEY_CLASSES_ROOT\*\shell\.OpenWith]
"Position"="Top"

[HKEY_CLASSES_ROOT\*\shell\.OpenWith\command]
@="{09799AFB-AD67-11d1-ABCD-00C04FC30936}"
Run the file with admin rights, and accept the on-screen warning. Once it’s been added, right-click any file, and you will see Open With at the top. Select it, and you will see the default Windows app picker menu that lets you select an app to open the file with.

You can still double-click a file and open it in the default app assigned to it. This registry edit will not interfere with the default functionality for opening files. Apps add their own options to the context menu will not be able to push this option further down the menu.
If you decide you don’t need this option anymore, go to the following location, and delete the key you added.
HKEY_CLASSES_ROOT\*\shell\.OpenWith
This little hack isn’t for everyone. Perhaps you prefer the Open option to remain at the top or you prefer a different option appear at the top. This is hack is for anyone that needs to open the same file type in multiple apps and doesn’t want to be bothered going through a rather long list of options to find the right one.
You may have noticed that after adding this key to the registry, the default Open With option doesn’t go away. This key doesn’t do anything to it which is why it remains where it is regardless if you’ve added the key or not. Touching the default Windows Open With option is probably a bad idea anyway. This registry file adds a new option that you can delete any time without worrying about breaking anything.
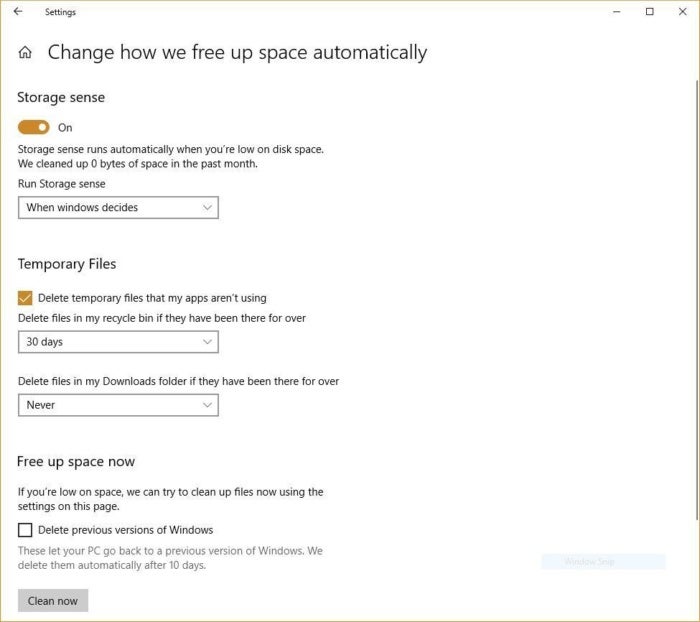 Here’s how to customize the way Storage Sense works, and to tell it to delete old versions of Windows.