lunes, mayo 28, 2018

8 Awesome WordPress Web Apps Paving the Way for WordPress as a SaaS Platform

De: https://www.elegantthemes.com/blog/resources/8-awesome-wordpress-web-apps-paving-the-way-for-wordpress-as-a-saas-platform

Posted on March 15, 2016 by Tom Ewer in Resources | 18 comments

8 Awesome WordPress Web Apps Paving the Way for WordPress as a SaaS Platform

Sometimes you need a web app and don’t have the time, skill, or budget to do custom development. Developing from scratch can be the solution for many problems, but it can take much longer than starting from an existing code base.

WordPress was originally designed as a blogging platform, and it continues to be well known for that. However, it has evolved into a fully fledged content management system (CMS) and, for some purposes, can even produce a solid web application – quickly, and at a significantly lower budget than custom development.

This article will introduce the idea of building a web app on WordPress, show you why you might consider it, examine some tools for building web apps in WordPress, then look at some great examples of what is possible.

Why Use WordPress for Web Apps?

Web apps can be custom coded from scratch, and many developers remain purists who feel that’s the only way to go. However, web application frameworks have been developed to help make the process of building web apps easier.

Ideally, building a web app would be quick to start, so you could get going and take advantage of some common built-in functionality. Wikipedia defines a Web Application Framework as:

…a software framework that is designed to support the development of web applications including web services, web resources and web APIs. Web frameworks aim to alleviate the overhead associated with common activities performed in web development. For example, many web frameworks provide libraries for database access, templating frameworks and session management, and they often promote code reuse.

With that in mind, it’s not hard to see how some people started to look at WordPress as a possible web application framework to help them build web apps. Though not specifically designed for that, WordPress has several features that make it a solid choice for your web apps, for example:

  1. Security, user registration and login: WordPress has user roles, which by default belong to one of five access levels, and can be assigned to different capabilities (e.g. edit posts).
  2. Database and URL mapping: WordPress enables you to easily connect to its database and run queries. You can modify how URLs are generated using pretty permalinks and add or modify the rewrite rules.
  3. Theming: WordPress themes offer a very flexible means of designing pages for your app.

WordPress isn’t always going to be the best tool for all types of web apps. It can work well for simple CRUD (Create, Read, Update, Delete) apps, and more complex functionality like calendar bookings, for example, can be done by integrating existing plugins. In general, projects related to publishing some form of content online may be possible candidates for using WordPress, especially where you want to use the same content across multiple products (e.g. website, mobile app etc.).

Tools for Building Web Apps in WordPress

While WordPress does offer built-in features we can use for web apps, you may require additional functionality. The built-in page and post structures can be used for a lot of things, but if you need custom data and fields to be added, searched or queried, manipulated, and displayed, some additional work is needed. Fortunately, tools do exist to help expand on WordPress’ native capabilities.

WordPress does have custom data capabilities in the form of custom fields, post types and taxonomies, but tools for working with them have been left up to plugins. Here are a few that have proven quite useful in moving WordPress away from simple blogging:

1. Advanced Custom Fields
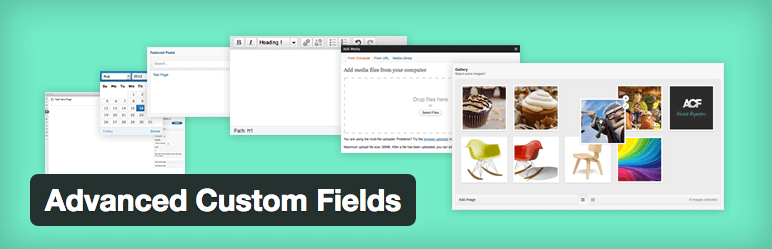
Advanced Custom Fields plugin

Available for free in the WordPress repository, Advanced Custom Fields (ACF) has been a long-standing favorite of developers for adding custom data functionality to WordPress. It provides a way to visually create custom data fields of various types (e.g. checkboxes, images, relationships) and easily load data through a simple API. It uses the built-in custom post types and metadata and so is easy to use and fast. For more content types and the ability to add options pages, you’ll need to purchase a licence for ACF Pro (which starts at $25).

2. Piklist

Piklist Framework

Billed as a rapid development framework for WordPress, Piklist enables you to easily create custom post types and taxonomies, add metaboxes and metafields to all the WordPress data types (posts, pages, media etc.), and create settings pages and widgets. The Piklist Framework can be downloaded for free from the WordPress repository.

3. Gravity Forms
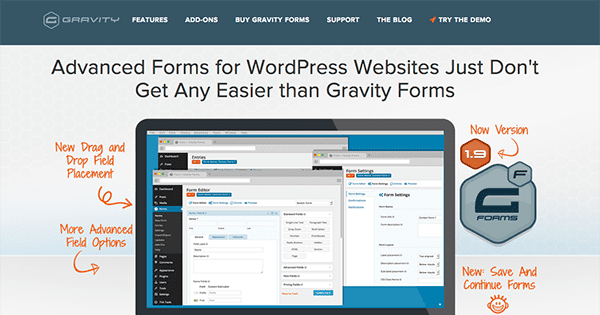
Gravity Forms

Gravity Forms is an advanced form builder, and includes a lot of functionality that can help with web apps. You can create forms to do CRUD operations on posts, pages and custom post types, as well as take advantage of functionality like commerce, scheduling and logic. Gravity Forms starts at $39 for a personal licence which doesn’t include any of the add-ons.

4. Toolset
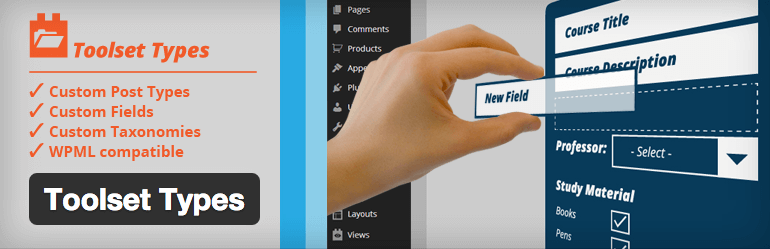
Toolset Types plugin

Toolset enables you to add custom types and fields to the WordPress admin and create ‘parent/child’ relationships between different types, to build relational-type databases. You can create custom page templates and archives for displaying searchable custom data. It also includes built-in functionality for creating front end forms for submitting content and editing. The Types plugin is free, but access to more advanced functionality requires purchasing the full Toolset (starts at $149).

5. WordPress REST API

WordPress REST API plugin logo

No discussion about using WordPress for web apps would be complete without considering the REST API, especially with a non-WordPress front end. Finally moving from the outskirts as a plugin into WordPress core, the REST API is changing the way apps interact with the WordPress back end, as shown in the recently released Calypso desktop app. We will be seeing more development in this area going forward as the code matures.

8 Awesome Web Apps Built on WordPress

Now that you have a broad understanding of how WordPress can be used as a web app framework and have familiarised yourself with a few of the plugins that can make life a lot easier in the process, let’s explore six awesome web apps built on WordPress that showcase just how capable the world’s favorite CMS is!

1. Train.rs
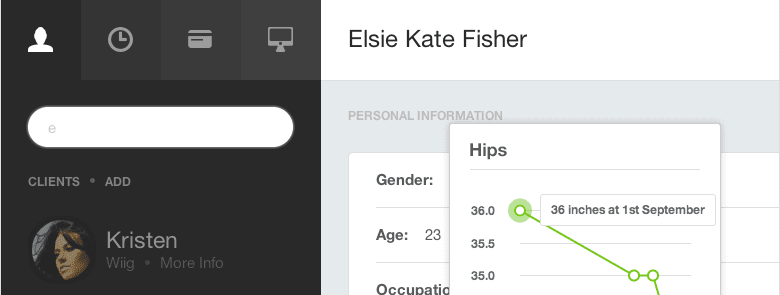
Trainrs web app

Train.rs provides a totally custom WordPress admin for managing personal trainers’ business.

Train.rs provides online business management for personal trainers. It uses WordPress as a foundation to give users hosted websites with customized administration of clients, training schedules, and billing. With the focus on users and custom data, WordPress makes easy work of this app.

2. YouTooCanRun
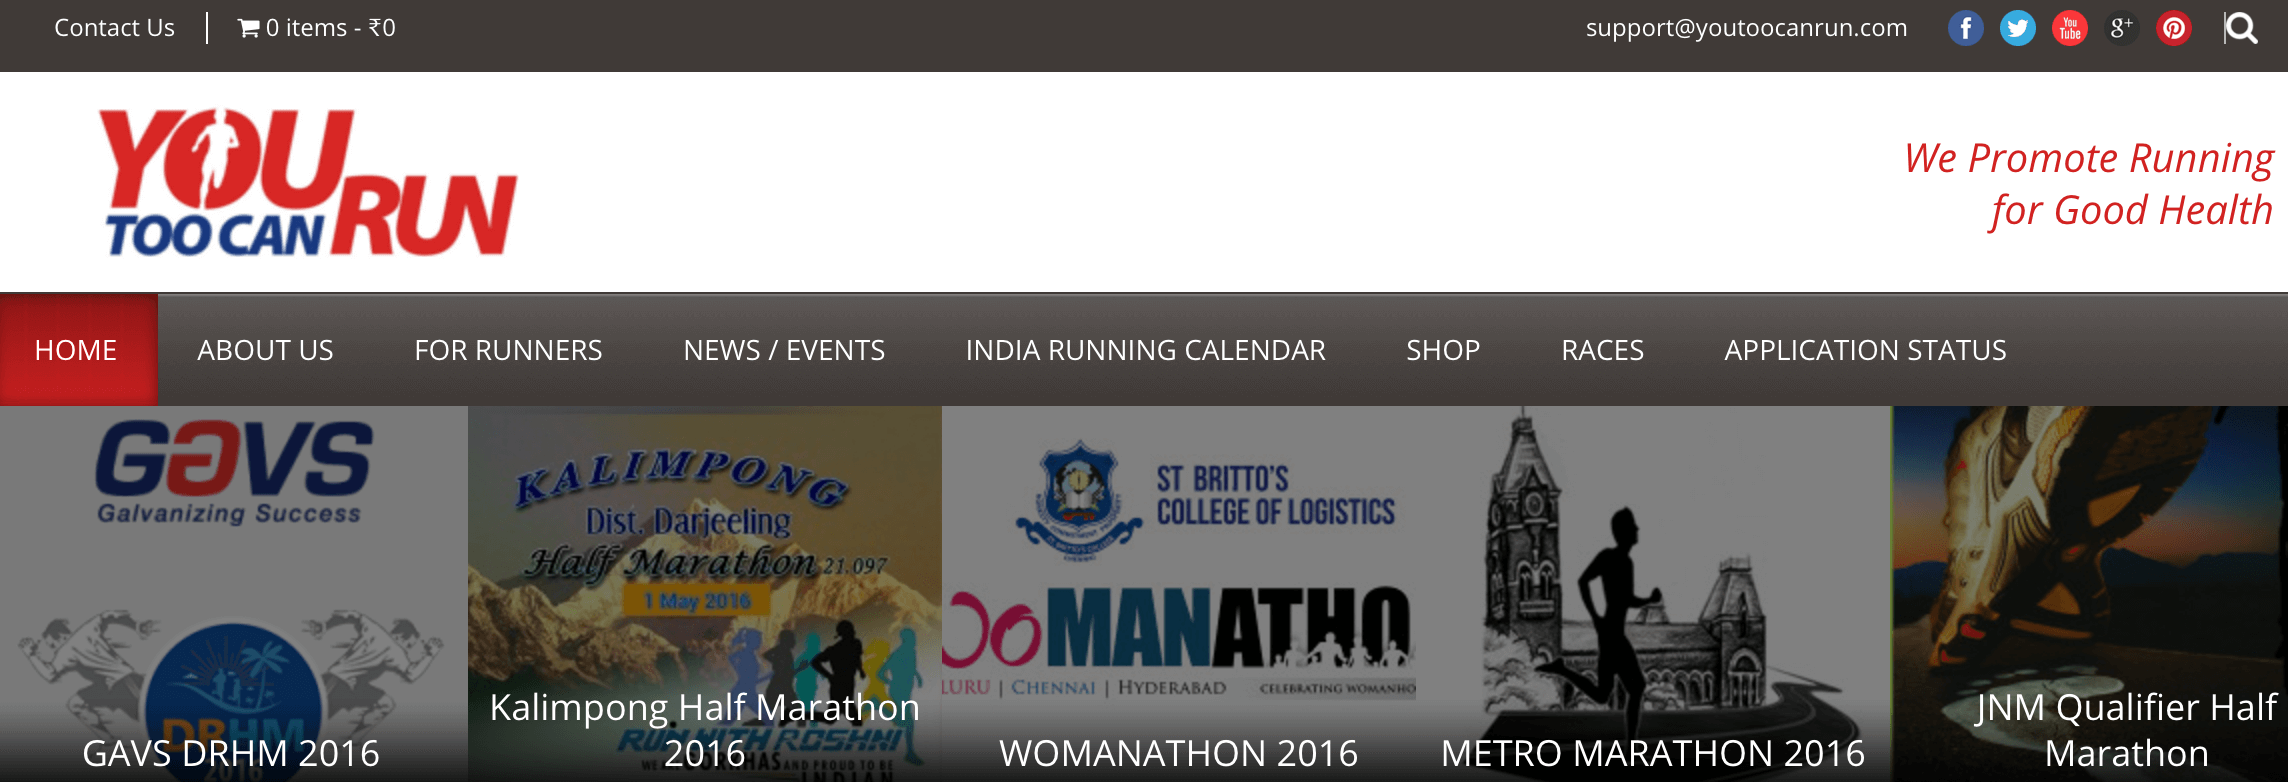
The YouTooCanRun homepage.

YouTooCanRun is a custom WordPress solution for managing the organization of marathon races, including paid registration of participants, generation of bib numbers and management of the event. It uses a combination of the Event Espresso and WooCommerce plugins to provide the needed functionality. As most of the functionality required was standard event and commerce behaviour, a WordPress solution combining plugins was perfect.

3. Pressbooks
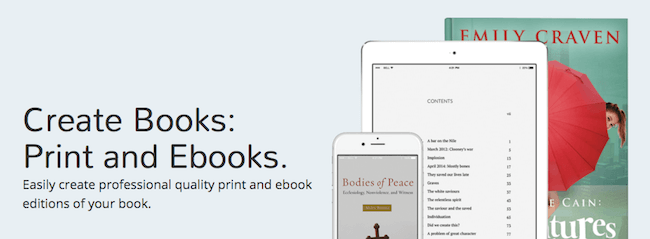
Pressbooks web app

Pressbooks manages book content and prepares it for publishing.

Pressbooks is online book production software. They have both a hosted version and a WordPress plugin. You can create your book online and then export to various file formats for book publishing. The tool is built in WordPress using customized admin screens for managing book information, for example. Pressbooks focuses on content, so WordPress is a great tool for this.

4. Focused on Fit

The Focused On Fit homepage.

Focused on Fit is an online fitness community built on WordPress. Interesting features include a database of food and recipes with nutritional facts, and the ability to log your meals and exercise and track your progress towards your goals. It goes further and uses the REST API to pull that data into mobile apps for use on the go. The social aspect and user management makes this a good use case for WordPress.

5. StudyChurch

The StudyChurch homepage.

StudyChurch is a web app designed to help small church groups work through study materials together. It pieces together several WordPress plugins, such as BuddyPress, and a forum to enable users to write lessons that are available to group members who can then discuss and collaborate on the answers. With the focus on users management and content, this is a great use case for WordPress.

6. Nomadbase
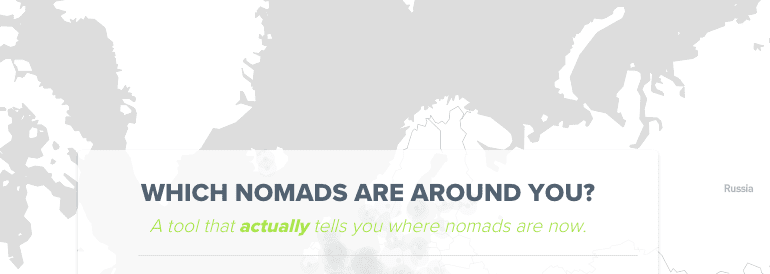
NomadBase web app

The REST API powers this app as it pulls together location data for digital nomads.

Nomadbase is a real time map for digital nomads. Using location data from your social media apps (Facebook, Swarm, Twitter or Instagram), users’ past, present and future positions are shown on a city-level to other nomads to encourage connections and interactions. It is built using the REST API with a React and Leaf front end. This is an interesting use case for WordPress, focused on user data.

7. Code Cavalry

The Code Cavalry homepage.

Code Cavalry enables coding novices and web designers to connect with experts over Google Hangouts to solve problems. Though based in WordPress, the app interacts with Firebase through AngularJS. The developer outlines the approach taken in The Road to Code Cavalry. The focus of this app is the users and so using WordPress gave a good head start in development.

8. Hello Bar
The Hello Bar homepage.

Hello Bar is a ‘Software as a Service’ (SaaS) platform designed to help users monetize their websites by building an email list. It provides you with ways to promote content, get more subscribers and measure and test the effectiveness of your campaigns. For more detailed information on how the team approached the development of Hello Bar you can check out the series of articles they wrote. They took advantage of WordPress’ built-in user management with custom themes and plugins to provide an experience that looks nothing like WordPress.

Conclusion

While WordPress is not perfect or suited for all web application needs, it can be a very useful tool for certain types of web apps. Stop thinking of it just as a blogging platform and you can start to see the possibilities for using its existing structure to help bring a web app to life quickly and under budget.

We have provided you with several examples of web apps built on WordPress which should have provided some inspiration and food for thought as to how you can use WordPress for more than just basic websites.

Have you built a web app using WordPress? Please share your favourite tools and tips that we may have missed in the comments section below!

Article thumbnail image by ideyweb / shutterstock.com

WordPress + a Form Plugin

De: https://zapier.com/learn/forms-surveys/simple-database-app-builders/#wordpress


WordPress + a Form Plugin

for self-hosted internal tools integrated with your blog

WordPress form

Yes, it's a blog engine. Yes, it's not your typical app builder. It's not even your typical form builder. But WordPress is built on a MySQL database, and if you're running it on your own servers, you can turn a WordPress installation into a feature-filled app that might not even include a blog.

You'll first need to install a WordPress form builder plugin—Gravity Forms, Formidable, and Ninja Forms are all great options. You'll build a form with your form builder, and then whenever your form is filled out, your data will show up in your MySQL database. Now, you can use the form plugin's own features to display your form data in WordPress, or you can build your own MySQL queries or MySQL plugins to display your database info inside your own pages in WordPress.

It'll take a bit more work, but you'll end up with something almost as customizable as a hand-built MySQL app without the headaches of software development.

  • Price: Free, plus form plugin and hosting costs
  • Skill Level: Advanced—easy to make a basic form, but accessing the database will take more work

For a deeper look at features and pricing, see our WordPress review , then check our Gravity Forms review for info about a compatible form plugin.

miércoles, mayo 09, 2018

How to Record the Sound Coming From Your PC (Even Without Stereo Mix)

De: https://www.howtogeek.com/217348/how-to-record-the-sound-coming-from-your-pc-even-without-stereo-mix/

You don’t have to hold up a microphone to your computer’s speakers to record its audio. Even if you don’t have a Stereo Mix option on your PC, you can easily record the sound coming from any Windows PC.

You can record the sound coming from your PC in numerous ways, and we’re going to show you the three best we’ve found. The first two options use only software, and the third relies on an old trick that connects your computer’s audio output to its audio input with an audio cable.

Option 1: Stereo Mix

Stereo Mix is sometimes called “What U Hear.” It’s a special recording option that your sound drivers might provide. If it is included with your drivers, you can select Stereo Mix (instead of a microphone or audio line-in input), and then force any application to record the same sound that your computer is outputting from its speakers or headphones.

RELATED: How to Enable “Stereo Mix” in Windows and Record Audio from Your PC

On modern versions of Windows, Stereo Mix is generally disabled by default—even if your sound drivers support it. Follow our instructions to enable the Stereo Mix audio source on Windows. After enabling Stereo Mix, you can use any audio-recording program, and just select “Stereo Mix” as the input device instead of the usual “line-in” or “microphone” option.

On some devices, you may not have this option at all. There may be a way to enable it with different audio drivers, but not every piece of sound hardware supports Stereo Mix. It’s unfortunately become less and less common.

Option 2: Audacity’s WASAPI Loopback

Don’t have a Stereo Mix option? No problem. Audacity has a useful feature that can record the audio coming out of your computer—even without Stereo Mix. In fact, Audacity’s feature may be even better than Stereo Mix, assuming you’re willing to use Audacity to record the audio. This method takes advantage of a feature that Microsoft added in Windows Vista named the Windows Audio Session API (WASAPI). The feature also functions in Windows 7, 8, and 10, and helps make up for the lack of a Stereo Mix option on modern Windows PCs.

In Audacity, choose the “Windows WASAPI” audio host, and then choose an appropriate loopback device, such as “Speakers (loopback)” or “Headphones (loopback).”

RELATED: The How-To Geek Guide to Audio Editing: The Basics

Click the Record button to start recording the audio in Audacity, and then click Stop when you’re done. Because you’re using Audacity, you can easily trim and edit the sound file when you’re done.

Audacity’s tutorial website explains why this feature is actually better than Stereo Mix:

“WASAPI loopback has an advantage over stereo mix or similar inputs provided by the soundcard that the capture is entirely digital (rather than converting to analog for playback, then back to digital when Audacity receives it). System sounds playing through the device selected for WASAPI loopback are still captured, however.”

In other words, your recorded sound file will be higher-quality when using Audacity’s WASAPI loopback option.

Option 3: An Audio Cable

If neither of the first two options suit your needs, there’s always the low-tech solution—although it’s a bit of a hack. Just get an audio cable with a male 3.5mm connector on both ends. Plug one end into the line-out (or headphone) jack on your PC, and the other end into the line-in (or microphone) jack. You’ll stop hearing the sound your computer produces, but you can use any audio-recording program to record the “line in” or “microphone” input. To actually hear the sound, you could get a splitter, and then output the audio to headphones or speakers at the same time you direct it back into your computer.

Sure, this is inconvenient and silly compared to to the first two software-only options we talked about. But, if you desperately need to capture the audio coming out of your computer in an application that isn’t Audacity and you don’t have Stereo Mix, the cable trick allows you to do this.


Obviously, copyright laws may prevent you from distributing whatever recordings you make in this way, so don’t use these tricks for piracy! After all, even if you were going to pirate some audio, there’d be easier ways to do it than this.

How to Enable “Stereo Mix” in Windows and Record Audio from Your PC

De: https://www.howtogeek.com/howto/39532/how-to-enable-stereo-mix-in-windows-7-to-record-audio/

banner

Ever need to record something on your computer exactly as it comes out of your speakers?  Enabling “Stereo Mix” will let you do exactly that, and here’s how to do it.

Nowadays, most sound cards have the ability to record whatever is being output.  The only hang-up is accessing that recording channel, which can be done rather easily.

Enable Stereo Mix

Go down to the audio icon in your system tray, right-click it, and go to “Recording Devices” to open up the proper settings pane.

stereo_mix_01

In the pane, right-click on a blank area, and make sure both “View Disabled Devices” and “View Disconnected Devices” options are checked.  You should see a “Stereo Mix” option appear.

stereo_mix_02

Right-click on “Stereo Mix” and click “Enable” to be able to use it.

stereo_mix_03


I Still Don’t See It…

In some cases, your audio chipset drivers aren’t helping your cause.  Most likely, this is because they’re outdated.  In other instances, however, it’s because the newest Windows drivers for your chipset don’t support this feature.  This was the case on my Asus Eee PC (a 1000HE), but I got around the issue by downloading and installing the older Windows XP/Vista drivers for my audio chipset.  As always, before changing your drivers, make sure create a system restore point in case things don’t go as planned.

How Do I Use This?

With “Stereo Mix” enabled, you can open up your favorite recording program and select that instead of your microphone before you record.  If you don’t see the option, or your program doesn’t give you the ability to change the recording device, you can disable or unplug your microphone and make “Stereo Mix” the default recording device.

stereo_mix_04

This works well for when you want to capture audio for a screen-sharing session, or record audio from streaming sources–such as live web-casts–that don’t necessarily allow you to download content immediately.  In order to do that, you’d open up your audio recording application of choice (like Audacity), and find the option for microphone input. Select Stereo Mix as your input (if it isn’t already), be sure other recording devices are muted or disabled, and click record.

audacity

Be sure to check out our article, The How-To Geek Guide on Audio Editing: The Basics, to learn how to use Audacity.

miércoles, febrero 28, 2018

How to download a file with Anti-virus warning on Gmail [updated April 2017]

De: http://www.barfuhok.com/how-to-download-a-file-with-anti-virus-warning-on-gmail/

Yesterday, I was searching in my Gmail for old files that I wanted to download. Once the email opened, I had a particular surprise: Anti-virus warning – 2 attachments contain a virus or blocked file. Downloading these attachments is disabled.

gmail-anti-virus-warning

Why do we have this anti-virus warning?

Like I said, this error was kind of surprising since I know for sure those files don’t contain viruses. After reading the Learn more link, I realized that those files were marked as a virus because they contained another .zip file in it. According to this link again, it is also possible to have a file blocked if it figures in the list of the Gmail blocked file type (for example a .bat file). You can take a look to the banned files type list here.

I think this is good that an anti-virus has been implemented into Gmail, but it should let the user choose if they want to be able to download their files anyway. They should only put a warning and let the download happens if this is what the user want. Since this is not the case, we need to think outside of the box to be able to download those files!

How to download the blocked files anyway

Available solutions:
1- Save email and open it in Outlook or any other email client (new solution, working)

Method 1: Save email and open it in Outlook

1- Click on the “More” arrow at the top right of the email and click on “Show original”.

gmail-down-blocked-files-outlook-1

2- Click on “Download original” at the bottom left.

gmail-down-blocked-files-outlook-2

3- Save the file as “email.eml“. The file extension needs to be .eml.

4- Open the file with outlook, or any other email client. You will now be able to download your files.

gmail-down-blocked-files-outlook-3

UPDATE: I will include Sara’s comment here, since it seems to have helped many people.
I tried this and it worked ;). Just open the email on gmail app. Here you can download the files without restrictions, then just send the files from your phone to your PC using USB conection or another message app which allows to attatch documents (like whatsapp or telegram). Hope it helps!

domingo, febrero 18, 2018

odrive–unlimited file size

DIY

Considering the fact that we are creating a brand new system to facilitate unlimited file sizes and universal upload resume capabilities, it is important to us that this system be completely transparent, and independent of odrive. To demonstrate this, we created some simple shell scripts that anyone can use to re-assemble the raw odrive IFS file packages.

Powershell:

#Run inside the parent of the downloaded .xlarge directory
$xl_dir_name = "[name of xlarge directory]"
$xl_name = $xl_dir_name.Substring(0,$xl_dir_name.Length-40)
$meta_path = "$xl_dir_name\.meta"
$segments = Select-String -pattern "CLOUD-XL-SEGMENTS" $meta_path -List
$num_segments = $segments.line.split(":")[1]
echo "Assembling $xl_name...."
rm "$xl_name" -erroraction 'silentlycontinue'
ni "$xl_name" -type file | Out-Null
for ($i=0; $i -lt $num_segments; $i++) {
$cur_seg = Select-String -pattern "CLOUD-XL-SEGMENT:$i" $meta_path -context 0,2 -List
$filename = $cur_seg.context.DisplayPostContext[1].split(":")[1]
echo "adding segment: $filename to $xl_name"
$copy_output = $(cmd /q /c copy /b "$xl_name" + "$xl_dir_name\$filename" "$xl_name")
}

Bash:

#Run inside the parent of the downloaded .xlarge directory
xl_dir_name="[name of xlarge directory]"
xl_name="${xl_dir_name::${#xl_dir_name}-40}"
meta_path="$xl_dir_name/.meta"
num_seg_str=$(grep "CLOUD-XL-SEGMENTS:" $meta_path)
num_seg_str_split=(${num_seg_str//:/ })
num_segs=${num_seg_str_split[1]}
for (( i=0; i<$num_segs; i++)) do
cur_seg_str=$(grep -A 2 "CLOUD-XL-SEGMENT:$i" $meta_path | grep "CLOUD-XL-SEGMENT-HASH")
cur_seg_str_split=(${cur_seg_str//:/ })
filename=${cur_seg_str_split[1]}
echo "adding $xl_dir_name/$filename to $xl_name"
cat "$xl_dir_name/$filename" >> "$xl_name"
done

miércoles, enero 31, 2018

Add and sync shared folders to OneDrive

This article is for OneDrive when you're signed in with a personal account on Windows 10, Windows 7, Windows Vista, or Mac. "Add to my OneDrive" isn't available in Windows 8.1 or on other operating systems when you're signed in with a work or school account.

When someone shares a folder and gives you edit permissions to it, add the shared folder to your own OneDrive to make it easier to edit and work with the folder and its contents. If you sync the folder to your Windows or Mac computers running the OneDrive app, you can work with the folder offline.

Note: Shared folders added to your OneDrive do not use any of your OneDrive storage space. They only count against the folder owner's storage space.

Add a shared folder to your OneDrive

Sign in to OneDrive on your browser.

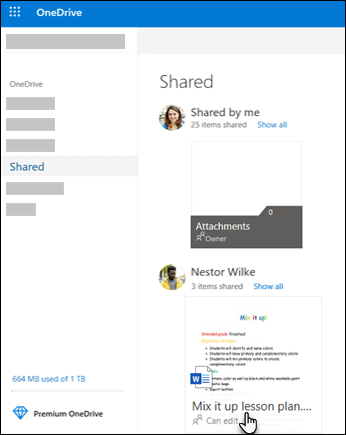
  1. In the OneDrive navigation pane, under OneDrive, click Shared. Folders you can add to your OneDrive are marked Can edit.

    OneDrive Shared folders

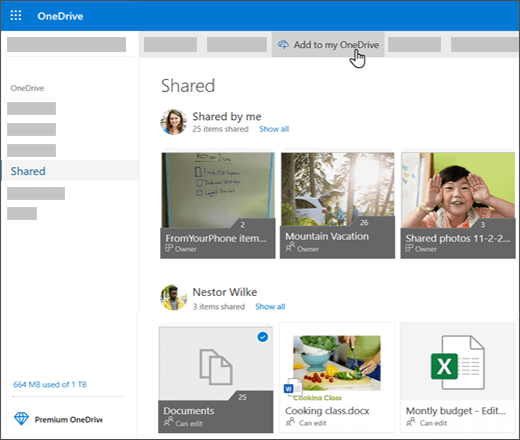
  2. Find the folder you want to add, and click the circle in the folder's tile to select it.

  3. Click Add to my OneDrive. Or, if you prefer, you can right-click the folder and then click Add to my OneDrive. Add shared folder to OneDrive

Important: The Add to my OneDrive option isn't available when:

  • You're signed in with a work or school account.

  • You've already added the folder to your OneDrive.

  • The item you're trying to add isn't a folder. Add to my OneDrive isn't available for individual files or for collections such as albums.

Tip: If you don't want the folder contents to sync and be shared, you can click Download. This copies the folder and its contents to your computer, not to your OneDrive. The files are available for you to edit offline, but you would not see updates made by others, and they would not get updates you make.

Find shared folders in your OneDrive

Shared folders you've added to your OneDrive appear in the OneDrive website in your Files view.

If you use the OneDrive sync app on your computer, you can sync the folder to your computer. On a Windows PC, find the folder in Windows Explorer; on a Mac computer, use the Finder to locate it.

Notes:

  • If you have the OneDrive sync app but the shared folder does not sync to your computer, you might have selective sync turned on. This isn't common, but to fix it, go to your computer's system tray (if you use a Mac, go to the menu bar) and find the sync app.

  • OneDrive app in System Tray

  1. Right-click the sync app icon (if you're using a Mac, left-click it), and click Settings.

  2. On the Choose folders tab, check the box of the folders you want to sync.

More about shared folders on your OneDrive

Can I still access shared folders if I don't add them to my OneDrive?

Yes, you can access them from your Shared list on OneDrive.com or in the OneDrive mobile apps. You can still copy, move, edit, rename, share, and delete anything in the folder.

What happens if I move items into or out of a shared folder?

When you move items between shared folders, they lose their existing permissions and get the permissions from the folder you moved them to. For example, if you move an item to a read-only folder, the item becomes read-only as well. Moving an item from a shared folder to an unshared folder means that item is no longer shared with anyone. If you move items only within a shared folder, there is no change to any of the assigned permissions.

What happens if I move the shared folder itself?

You can't move shared folders on OneDrive.com. If you sync OneDrive to your computer, any shared folder you move is copied to the destination location and then removed from your OneDrive. It is still available in your Shared list.

Note: Be careful when moving folders, as it can affect the folder's sharing permissions. If you move a shared folder into another folder, it takes the permissions of the destination folder. This means people can access it only if they also have permissions to the destination folder - if the destination folder isn't shared, then the folder you moved is also not shared anymore.

Can I rename a shared folder that I’ve added to my OneDrive?

Yes, you can. The new name you give to the folder is visible only to you, and will appear with that name anywhere you access your OneDrive, including OneDrive.com, the OneDrive app on your computer, or the OneDrive mobile apps. The name change won’t be visible to the shared folder owner, nor anyone else with permissions to the folder.

Note: Renaming or changing any of the folder's contents, however, is visible to others sharing the folder.

Why don’t items that have been deleted from a shared folder appear in my recycle bin?

Items deleted from a shared folder on OneDrive.com are sent to the recycle bin of only the shared folder’s owner. However, if you sync your OneDrive on a computer, items deleted from a shared folder do appear in the computer’s recycle bin.

Note: Only the owner of a shared folder can restore an item deleted from the folder.

How can I remove a shared folder that I've added to my OneDrive?

On OneDrive.com, in Files view, select the shared folder you want to remove, then click Remove from my OneDrive. This only removes the folder from your OneDrive - it is still accessible from your Shared list and doesn't affect the owner or anyone else sharing the folder. If you delete the folder instead, it's deleted from everyone's OneDrive and the folder owner would have to restore it.

Note: If you sync OneDrive to one or more computers, removing a shared folder from your OneDrive also removes it from those computers.

What happens if the owner stops sharing a folder that I've added to my OneDrive?

If a folder is no longer shared with you, it is removed from your OneDrive. To get back your access to the folder, ask the owner or an editor to share it with you again.

jueves, noviembre 30, 2017

FoxyDb - Librería de conexión a Servidores de Bases de Datos desde VFP

https://foxydb.wordpress.com/

Desarrollada por Antonio Meza Pérez

¿Que es FoxyDb?

Es una librería Gratis (OpenSource) para Visual Fox Pro 9.0 sp2 que nos permite conectarnos a servidores de Bases de Datos como Mysql, MariaDB, FireBird de forma transparente para el Programador, en el futuro PostgreSQL, Sql Server, (¿y por qué no otros más?), con solo cambiar una simple propiedad de la librería funcionara de forma transparente con cualquier servidor de datos, ajustando posiblemente algunas instrucciones SQL propias de cada servidor, que no son un estándar SQL y los parámetros de conexión a los diferentes servidores.

martes, octubre 17, 2017

Conectar una impresora a un módem router Technicolor

How do I set up multiple computers to share a printer using the Thomson TG782T, Technicolor TG587n or TG582n Home Network Gateway Home Network Gateway?

The Technicolour Home Network gateways allow you to share your printer with multiple computers. This means you can print documents from any computer connected in the home to a single printer (The gateway supports most common printers.)

printsharing-top.jpg

To do this, you will need to perform the following steps on each computer. Note: All the computers need to be connected to the gateway.

Step 1 of 10
You will need to first install the printer drivers on the computer if you have not done so already. Follow the following instructions to install the driver:

  • Plug in the printer to the computer directly.
  • Follow the instructions to install the printer driver on the computer. The printer driver software should have been provided by your printer manufacturer.

Step 2 of 10
Plug in the printer into the USB port on the side of the Thomson gateway. Click on Start -> Control Panel -> Printers.

printer1-stp2.jpg

Step 3 of 10
Click on Add a printer

printer2-stp3.jpg

Step 4 of 10

Select Add a local printer and click Next.

Step 5 of 10
Select Create a new port and choose Standard TCP/IP Port from the drop down menu.

printer3-stp5.jpg

Step 6 of 10
Type in 192.168.1.253 in the Hostname or IP address field. Click Next. It will try and detect the TCP/IP port but will not be able to find it and prompt for more information.

printer4-stp6.jpg
Step 7 of 10
Select Custom and click on the Settings button.

printer5-stp7.jpg
Step 8 of 10
Select LPR and type in TG782 printer in the Queue Name field. It will then search for the printer driver.

printer6-stp8.jpg
Step 9 of 10
Select your printer manufacturer and model. Click Next.

printer7-stp10.jpg

Step 10 of 10
Type in a printer name and click Next. This should complete the installation process. You should now be able to print using the shared printer.

If you would like to enable another computer to print to the shared printer, repeat the above steps with the other computer.

miércoles, octubre 04, 2017

Cómo extraer el audio de un vídeo con VLC

[De: http://www.proyectoautodidacta.com/comics/como-extraer-el-audio-de-un-video-con-vlc/]

Cómo extraer el audio de un vídeo con VLC (I)

Cómo extraer el audio de un vídeo con VLC (II)

TRANSCRIPCIÓN

VLC contiene unas funciones de conversión bastante potentes que nos permiten pasar con facilidad un vídeo de un formato a otro.

No vamos a entrar en ellas, pero sí vamos a revisar rápidamente una que puede ser muy útil: la extracción del audio de un vídeo.

Para hacerlo, seguimos los siguientes pasos:

Abrimos el VLC, vamos al menú “Medio” y seleccionamos la opción “Convertir”. También podemos pulsar el atajo de teclado CTRL+R.

Se nos abrirá la ventana “Abrir medio”. Clicamos en el botón “Añadir” y seleccionamos el vídeo del cual queremos extraer el audio.

Una vez añadido, clicamos en el botón “Convertir/Guardar”.

Se nos mostrará la ventana “Convertir”. En el apartado “preferencias”, nos vamos a lista desplegable “Perfil” y seleccionamos “Audio – MP3”.

Después, en “Destino”, clicamos en “Explorar” para seleccionar la carpeta donde guardar el archivo de audio y escribimos el nombre que tendrá.

Por último, clicamos en “Iniciar”.

El VLC empezará a hacer la conversión. Su avance se nos mostrará por medio del control deslizante. El tiempo que tardará en hacer la conversión dependerá de la extensión del vídeo.

Una vez haya terminado, tendremos en la carpeta indicada el archivo de audio extraído.

Por lo general, con esto será suficiente para hacer una extracción común. También podemos personalizar la calidad del audio, pero eso es algo más avanzado y no vamos a entrar en ello.

Cómo descargar vídeos de YouTube con VLC Media Player

[De: https://www.mediatrends.es/a/99633/como-descargar-videos-de-youtube-vlc-media-player/]

¿Cuántas veces has visto un vídeo de YouTube y has querido guardarlo pero no has sabido cómo? Seguro que muchas y es más fácil de lo que imaginas. Sólo necesitarás tener VLC Media Player actualizado y seguir una serie de pasos para guardar el archivo en tu ordenador. Así que lee con atención porque te explicamos cómo descargar vídeos de YouTube.

Si ya sabes cómo descargar vídeos de Facebook y conoces la app YouTube Go para ver y descargar vídeos offline, es hora de aprender a hacerlo desde VLC Media Player.

¿Cómo descargar vídeos de YouTube?

Para empezar, debes asegurarte de tener la última versión de VLC Media Player en tu ordenador. Una vez hecho esto, es hora de elegir el vídeo que quieres descargar y copiar la URL.

descargar-videos-youtube-mediatrends2

Ve a VLC Media Player y busca en el menú Medios la opción ‘Abrir dispositivo de captura’ (‘Open Capture Device’ en inglés) y clica sobre él. Cuando lo hagas, se abrirá una nueva ventana. Busca la opción ‘Red’(Network en inglés), copia el enlace de YouTube y dale al Play.

descargar-videos-youtube-mediatrends1

Cuando el vídeo empiece a reproducirse, busca en la barra del menú la opción Herramientas y selecciona ‘Información multimedia’ (Media Information). Se abrirá una ventana con la información relevante sobre el vídeo. Abajo verás un enlace junto a ‘Lugar’. Justo esa URL es el enlace de descarga de tu vídeo de YouTube.

descargar-videos-youtube-mediatrends3

Cópialo y pégalo en la barra de tu navegador Chrome o Firefox. En este momento pueden ocurrir dos cosas: que se inicie la reproducción del vídeo o bien se muestre una ventana para iniciar la descarga.

Si ocurre lo primero, pincha en cualquier parte del vídeo y selecciona ‘Guardar vídeo como’ y ahí podrás definir la carpeta de destino de tu ordenador donde quieres guardar el vídeo. Si por el contrario ocurre lo segundo (la ventana para iniciar la descarga) bastará con que definas dónde quieres guardar el archivo.

lunes, septiembre 11, 2017

Mobirise Review

De: https://www.cmscritic.com/mobirise-review/

Mobirise is an offline website builder for Windows and Mac, meaning that it needs to be downloaded to your desktop.
The drag-and-drop based website builder was born out of the Netherlands, and is designed to construct small-medium sized websites, landing pages, portfolios, and other such low-functionality websites.
It's marketed as user friendly for non-techies, minimalist, and totally free (even for commercial use).
Website builders don't need to much of an introduction. Startups, entrepreneurs and small businesses use them to kickstart their online presence, and they usually want to achieve that as quickly and as easily as possible. Oh, and without touching a line of code, too.
Let's see if Mobirise can rise to the challenge. Here's a video to get us started.

Initial Thoughts

The Mobirise website is clean and simple, for the most part.

Download buttons dominate the homepage, and it looks like a very inviting piece of software right off the bat. Minimalist indeed.
Yet, further down the homepage, lies an array of review quotes and testimonials. And when I say there is an array, I mean there is an array.

It's a little overkill to say the least. Not a massive deal, but clutter on the homepage of a website builder that touts simplicity isn't a convincing quality.

Getting Started

What's that? A website builder that I can't use through my web browser? Perish the thought.
But hold on just one second.
You may have to download and install Mobirise before you can use it - but believe me when I tell you that it's quicker to set up than most hosted website builders that require no downloads.
With Mobirise, you don't need to sign up or divulge any information whatsoever to begin downloading. The downloadable file is relatively small, installation is lightning fast, and there's no forms to fill out at any stage.
It went from a .zip file on my desktop to a ready-to-roll website builder in a matter of seconds. Impressive.

Page Creation

The page creation capabilities of a website builder help to define it as a platform. Unsurprisingly, Mobirise stays true to its focus on minimalism when it comes to page building.
The platform starts you off with a generic homepage, with a customization menu that can activated via an orange button at the bottom-right of the interface.

There are no standalone templates as such. Instead, you can choose from a number of different page blocks, piecing them together in a mix-and-match fashion to build a one-pager style website.

This method ensures that users stays within a pre-defined boundary when it comes to design, with just enough wiggle room to make some customizations. Such customizations include; images, videos, text, background images, background colours, show/hide elements, content aligning, and more.

I think there's a healthy balance struck here. The customization options aren't going to allow you to build anything drastically unique, but there's just enough there to help put your own stamp on your website.
As previously mentioned, this pre-defined design boundary will, in a way, push users towards creating a website that looks good, rather than leaving them to their own, (often inexperienced) devices.
In other words, if you suck as web design, you'll love Mobirise's method of website building.

I say that particularly because Mobirise's page blocks are so well put together. They include a selection of full-page sliders, information blocks, maps, forms, a pricing table, and more.
Upon hovering, each block presents three buttons in the top-right; Drag Block, Block Parameters and Delete Block.

The first option allows you to drag-and-drop the block above and below other blocks, essentially rearranging your website like Lego. The Delete Block button is pretty self explanatory.
As for the Block Parameters button, this brings up those customizations I mentioned earlier, allowing you to edit the block in question. Different block types comes with different parameters, too.

For example, a navigation menu block will give you the option to make the menu sticky, meaning that it will scroll down the page with the visitor; remaining visible at all times.
Further customization can be done by simply pointing and clicking on page elements. Otherwise known as inline editing. For example, clicking on a "Download" button brings up options to change the buttons color, and edit the text right there and then.

To add a new page to the existing homepage, you can go to the menu on the left, "Pages", and then "Create New Page". further page options enable you to clone pages, edit file names, set page titles, and add meta descriptions.
I feel that now is a good time to highlight the speed of Mobirise. I tinkered with all of the above settings, re-arranged page blocks and edited page elements - and it was a piece of cake. Mobirise is supremely speedy and responsive, just as a website builder should be.

Multi-Site Management & Publishing

Similarly, you can add a brand new website from the same side menu, by clicking "Sites" and "Create New Site".
Mobirise presents a grid-list of your existing sites on that same menu, allowing you to quickly switch between projects. Ideal for a developer with multple clients, one might say.
The site manager section also allows you to export a website, assign a favicon, and add a Google Analytics tracking code.
When it comes to actually publishing your website, Mobirise gives you a few options.

You can publish it to a local drive, upload it via FTP or use Google Drive. All three options seem to work fine, and they're solid options to make use of, too.

Apps & Extras

Mobirise has a couple of extra features which help round it off.
Firstly, there's the ability to preview your website in desktop view, tablet view and smartphone view. Just to ensure all those responsive pages are looking spcik and spam.

Plus, you can preview the website in your web browser.
You can also import and export Mobirise websites, which is cool if you're looking to share your work with somebody else, or move one website between two different accounts or devices.
There are only four extensions bundled. These are; Facebook Comments, Soundcloud, Code Editor & Google Analytics. However, the Code Editor is very highly priced, at $69.

Mobirise is showing its youth here I think. Four extensions is certainly nothing to write home about, and I think this should be an area of focus for the Mobirise team. I also think that charging $69 for a website builder's Code Editor is a little bit too bold. The price needs adjusting, if you ask me.
Extensions like Google Maps, Instagram photos, Disqus comments, a form builder and other standard extensions would all be welcome.

Getting Help

As far as help and support is concerned, there's not much to go on.
In fact, apart from some social media handles and an email address, there's no other way to reach out for support from official channels. There isn't even any documentation, which isn't really acceptable.
I would have expected a simple "Help" option somewhere on the website builder, or perhaps a document that comes bundled with the download. But surprisingly, there's nothing to help guide website building newbies at all.
The only saving grace is that Mobirise truly is easy to use out of the box. But still, that's no excuse.

The Verdict

Mobirise is an extremely simple website builder, and because that's exactly what it aims to be, I'm a big fan.
The level of customization that a newbie can implement is of a good level. There's limits on what can be created, which means they won't get lost in any complex menus. More experienced users can delve further into customization via the Code Editor extension (if they want to cough up the cash).
I'm also impressed with the quality of the blocks which can be dragged-and-dropped into place. They're the foundations of Mobirise, and they're brilliantly designed, with each one looking highly professional out of the box.
I have a few gripes, though. There aren't enough extensions to play with, and I feel that the page blocks could be a little more diverse. A few more different styles will provide just enough choice to ensure that users aren't constantly building similar looking websites.
Also, documentation and support need to be worked on. A user manual would be nice, and so would some FAQs on the Mobirise website.
Other than that though, Mobirise has won me over with its simplicity and speed.

Pros

  • Mobirise is extremely quick and easy to download and install.
  • Lego-like page blocks can be dragged-and-dropped into place, helping users construct websites that already look great.
  • All the pre-designed blocks are sleek and professional looking.
  • Customization options are pretty good, allowing for some useful modifications. An optional (yet expensive) Code Editor extension also gives experienced users complete control.
  • In-line editing plays right into the hands of inexperienced web designers. Point, Click, Edit.
  • You can upload the finished website via FTP, Google Drive or to a local server.
  • Easy to manage multiple sites.
  • Browser, Tablet and smartphone previews are easily accessible.
  • Everything is quick, responsive and bug-free. Mobirise is genuinely pleasant to use.

Cons

  • Not a hosted solution.
  • Not many extensions at all.
  • Documentation & support options are lousy.

Final Remarks

If a website building novice asks me to point them in the direction of a totally free website builder, Mobirise will now be high on my list of recommendations. I'm that impressed.
I expected to find some bugs somewhere along the line. Perhaps an unresponsive button or a slowly reacting page element. But I found nothing of the sort. Mobirise is a dream to use.
Aside from the aforementioned documentation and support issues, the only problem I can see is that a newbie website builder will flinch at the idea of having to find a web hosting environment for his or her Mobirise website. They would much prefer a hosted solution to take care of those technicalities.
Maybe I'm being pedantic, but it seems to me that Mobirise has been built for the same people who wouldn't even know how to "Publish" their site using FTP or Google Drive.
However, if the idea of uploading and hosting your own website doesn't bother you, I'd strongly recommend giving Mobirise a whirl.

Besides, it's a free platform that takes under a minute to set up, can be used by anybody, and can be hosted anywhere. What more could you want?